Netboot Windows 11 with iSCSI and iPXE
 I primarily run Linux, for work and for gaming. Unfortunately, some competitive games refuse to work on Linux or in virtual machines. This post explores installing and booting Windows 11 on physical hardware with a disk exported from a NAS.
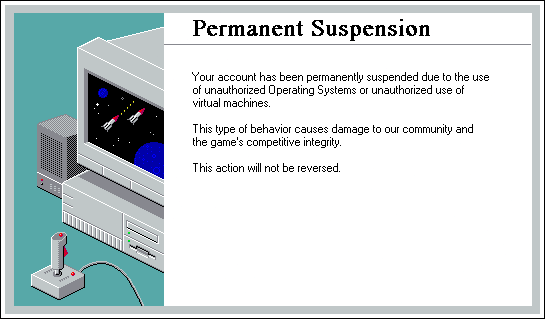
Purposefully ambiguous and fictious permanent ban.
(created with @foone’s The Death Generator)
My primary operating system is Linux: I have it installed on my laptop and desktop. Thanks to the amazing work of the WINE, CodeWeavers, and Valve developers, it’s also where I do PC gaming. I can spin up Windows in a virtual machine for the rare times I need to use it, and even pass through a GPU if I want to do gaming.
There is one pretty big exception: playing the AAA game ████████████████ with friends. Unfortunately, the developer only allows Windows. If you attempt to run the game on Linux or they detect you’re running in a virtual machine, your device and account are permanently banned. I would prefer not to be permanently banned.
For the past several years my desktop has also had a disk dedicated to maintaining a Windows install. I’d prefer to use the space in my PC case1 for disks for Linux. Since I already run a home NAS, and my Windows usage is infrequent, I wondered if I could offload the Windows install to my NAS instead. This lead me down the course of netbooting Windows 11 and writing up these notes on how to do a simplified “modern” version.
iPXE and iSCSI
My first task was determining how to get a computer to boot from a NAS. My experience with network block devices is with Ceph RBD, where a device is mounted into an already running operating system. For booting over an Ethernet IP network the standard is iSCSI. A great way to boot from an iSCSI disk is with iPXE. To avoid any mistakes during this process, I removed all local drives from the system.2
I didn’t want to run a TFTP server on my home network, or reconfigure DHCP to provide TFTP configuration. Even if I did, the firmware for my motherboard is designed for “gamers”, there’s no PXE ROM. I can enable UEFI networking and a network boot option appears in the boot menu, but no DHCP requests are made3. Fortunately, iPXE is available as bootable USB image, which loaded and started trying to fetch configuration from the network.
Hitting ctrl-b as directed on screen to drop to the iPXE shell, I could verify basic functionality was working.
iPXE 1.21.1+ (e7585fe) -- Open Source Network Boot Firmware -- https://ipxe.org
Features: DNS FTP HTTP HTTPS iSCSI NFS TFTP VLAN SRP AoE EFI Menu
iPXE> dhcp
Configuring (net0 04:20:69:91:C8:DD)...... ok
iPXE> show ${net0/ip}
192.0.2.3
I decided to use tgt as the iSCSI target daemon on my NAS4 as the configuration seemed the least complicated. In /etc/tgt/targets.conf I configured it with two targets: one as the block device I wanted to install Windows onto and the other being the installation ISO.
<target iqn.2025-02.com.example:win-gaming>
    backing-store /dev/zvol/zroot/sans/win-gaming
    params thin-provisioning=1
</target>

<target iqn.2025-02.com.example:win11.iso>
    backing-store /opt/isos/Win11_24H2_English_x64.iso
    device-type cd
    readonly 1
</target>
Back on the PC, I could tell iPXE to use these iSCSI disks, then boot onto the DVD. As multiple network drives are being added, each must be given a different drive ID starting from 0x80.
iPXE> sanhook --drive 0x80 iscsi:nas.example.com:::1:iqn.2025-02.com.example:win-gaming
Registered SAN device 0x80
iPXE> sanhook --drive 0x81 iscsi:nas.example.com:::1:iqn.2025-02.com.example:win11.iso
Registered SAN device 0x81
iPXE> sanboot --drive 0x81
Booting from SAN device 0x81
After a minute of the Windows 11 logo and a spinner, the Windows 11 setup appears. In an ideal situation, I could immediately start installing. Unfortunately, the Windows 11 DVD does not ship drivers for my network card, and the iSCSI connection information passed to the booted system from iPXE couldn’t be used. I’m a bit impressed the GUI loaded at all, instead of just crashing.
Chainloading WinPE
To rectify this, I would need to build a Windows PE image that included my networking drivers. WinPE is the minimal environment used when installing Windows. Fortunately, Microsoft has made this pretty easy nowadays. I downloaded and installed the Windows Assessment and Deployment Kit and the Windows PE add-on. After running “Deployment and Imaging Tools Environment” as an administrator, I could make a folder containing a base WinPE image.
> mkdir C:\winpe
> copype amd64 C:\winpe\amd64
After mounting the image, I was able to slipstream the Intel drivers. I searched through the inf files to find the folder that supported my network card.
> imagex /mountrw C:\winpe\amd64\media\sources\boot.wim C:\winpe\amd64\mount
> dism /image:C:\winpe\amd64\mount /add-driver /driver:C:\temp\intel\PRO1000\Winx64\W11\
> imagex /unmount /commit C:\winpe\amd64\mount
This new image is what we need to boot into to install Windows. As my NAS is also running an HTTP server, I copied over the files relevant to netbooting: from “C:\winpe\amd64\media” I copied “boot/BCD”, “boot/boot.sdi”, and “sources/boot.wim”, preserving the folders. I also downloaded wimboot to the same directory.
You can use iPXE to execute a script fetched with HTTP, which I took advantage of to reduce the amount of typing I’ll need to do at the shell. I saved the following script as “install.ipxe” in the same HTTP directory.
#!ipxe

sanhook --drive 0x80 iscsi:nas.example.com:::1:iqn.2025-02.com.example:win-gaming
sanhook --drive 0x81 iscsi:nas.example.com:::1:iqn.2025-02.com.example:win11.iso
kernel wimboot
initrd boot/BCD BCD
initrd boot/boot.sdi boot.sdi
initrd sources/boot.wim boot.wim
boot
Rebooting back to the iPXE prompt I could then boot using this script.
iPXE> dhcp
iPXE> chain http://nas.example.com/ipxe/install.ipxe
After a few seconds I was booted into WinPE with a Command Prompt. The command “wpeinit” ran automatically, configuring the network card and mounting the iSCSI disks. I found the DVD had been mounted as drive “D”, and could start the Windows Setup with “D:\setup.exe”.
However, after reaching the “Searching for Disks” screen the installer closed itself without any error. This seems to be a bug with the new version of setup, as restarting it and selecting the “Previous Version of Setup” on an earlier page used a version of the installer that worked.
The installation was spread across several restarts. Fortunately, once the installation files are copied over, nothing but the main disk image is required, reducing what I needed to type in the iPXE shell. The HTTP server could also be cleaned up at this point.
iPXE> dhcp
iPXE> sanboot iscsi:nas.example.com:::1:iqn.2025-02.com.example:win-gaming
After several more minutes, and a forced installation of a Windows zero-day patch, I was greeted by a Windows 11 desktop, booted over iSCSI. Task Manager even reports the C drive as being “SDD (iSCSI)”.
Automating Boots
Booting from a USB stick and typing into an iPXE prompt every time I want to boot into Windows isn’t a great user experience. Fortunately, iPXE is also available as an EFI application which can be installed to the local EFI System Partition. I also discovered that iPXE will execute commands provided on the command line.
I reinstalled the disks used for Linux, copied over ipxe.efi to the EFI System Partition, and added a new entry to systemd-boot by creating “$ESP/loader/entries/win11.conf”
title Windows 11 (iPXE)
efi /ipxe/ipxe.efi
options prompt && dhcp && sanboot iscsi:nas.example.com:::1:iqn.2025-02.com.example:win-gaming
There seems to be a bug where the first word in the options field is ignored.5 I used a valid iPXE command prompt, which also provides a clear signal should it ever start being interpreted in the future version.
Let’s Game
After a little bit of extra setup (installing Firefox and switching to dark mode), I was able to install Steam and the game. The game took a little bit longer to install due the slower disk speed over my network (time to upgrade to 10GbE?), but there was no noticeable delay during normal gameplay. I didn’t see any network saturation or high disk latencies in Task Manager during loading.
My computer is built into the Cooler Master NR200P mini-ITX case, which only has space for two 2.5" SATA drives. ↩︎
You probably want to remove the disks anyways so Windows doesn’t install its boot manager to an EFI System Partition on a local disk. To boot with iPXE later, you’ll want Windows to create an EFI System Partition on the iSCSI disk. ↩︎
The UEFI configuration doesn’t have any options for manually specifying networking parameters, either. ↩︎
Long time iSCSI on Linux users may find the choice of STGT peculiar, it having been replaced with the kernel-space target LIO as the iSCSI target daemon back in 2010. My limited usage at home isn’t going to run into performance issues with tgt, and I prefer being able to start and stop a user-space daemon. ↩︎
I’m not sure if this is a bug in systemd-boot or in iPXE. ↩︎